Page 2
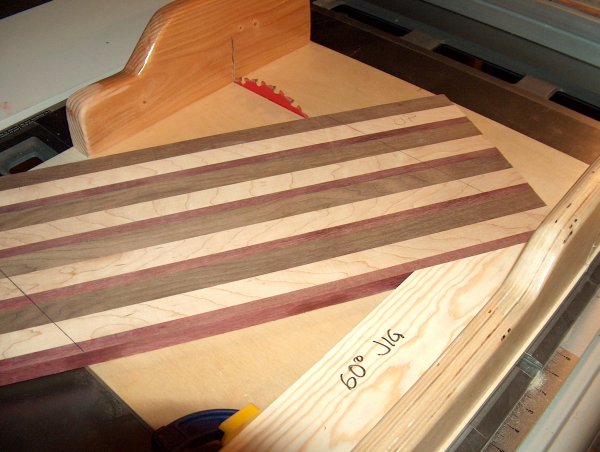
OK, now that the glue has dried and the rough spots have been sanded off, it's time to cut up the new board. To create the 3-D effect, I cut 60° slices of the striped glue-up and use my crosscut sled and a piece of scrap wood that I've cut at a 60° angle clamped to the sled fence. Of course you can tell it's a professionally-made jig by observing the quality of the label.
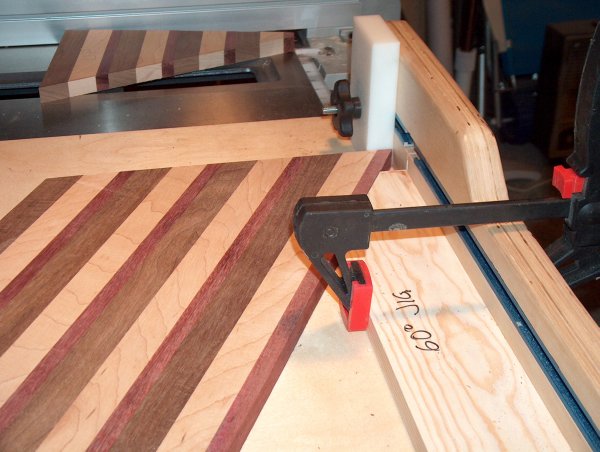
Here's another shot of the jig and sled arrangement. (I switched clamps, in case you were wondering.) To make the 3-D pattern work, it's important for the slices to be exactly the same width. It doesn't really matter what the width is, just that it's the same for each piece. For this board, I chose to make the slices 1 1/2" wide. The number of slices is also completely up to you. I went with twelve slices for this board, but 6, 8 or 10 would also work.
You can see in this picture that I used a stop block to ensure each slice is the same width. (Note to the observant...yes, this picture and the previous one were from a different board than all the other shots. You'll notice the purple heart strips are wider in these two shots.)
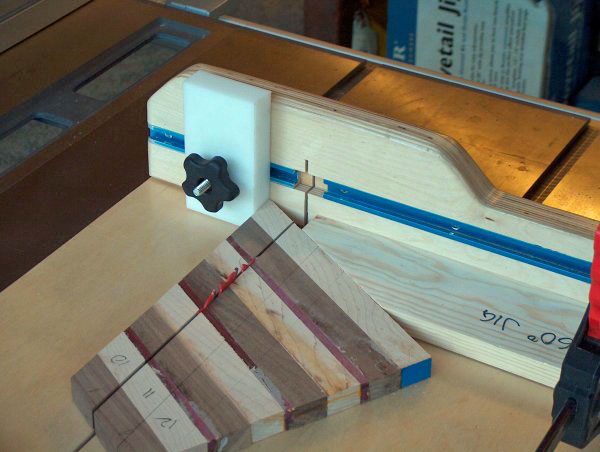
And yet another shot, after cutting most of the slices:
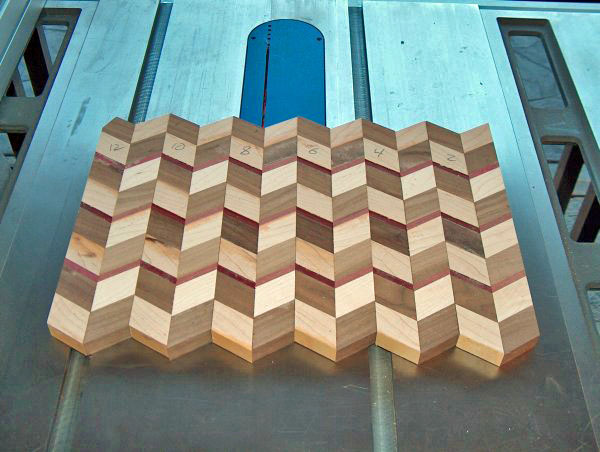
When all the slices have been cut, you'll have something like this...
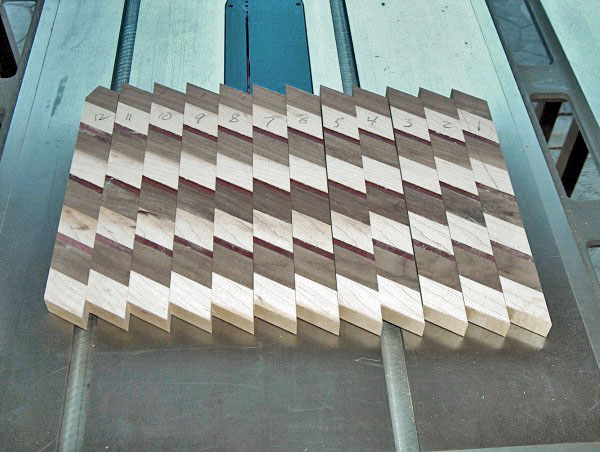
Now here's where the fun begins. Take every other one of the slices, and flip it end-for-end. In this example, I flipped each even-numbered slice. The even numbers are now on the underneath side of the slices, written on the end closest to the camera. This produces an alternating maple/walnut/maple "checkerboard".
Another alternative, although not as appealing to me, is to flip every other slice without switching ends. This keeps the maple lined up with other maple pieces, and walnut lined up with walnut. It creates more of a zigzag pattern instead of a 3-D effect. I don't have a picture of this alternative pattern, but if you make a board like this you can lay it out that way and see if you like it.
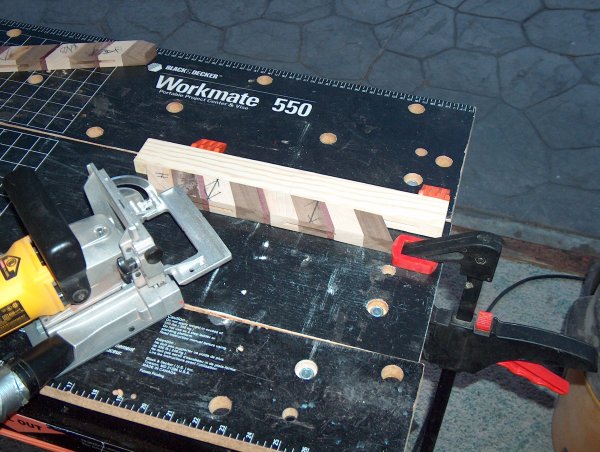
Since the cut edges of the slices are essentially end grain wood, I like to use biscuit joints to glue them back together. This adds a bit of strength, and also help to keep things aligned as you glue the slices together. I temporarily clamp the pieces together after carefully aligning them, then draw pencil lines as a guide for the biscuit joiner. (These lines will be more apparent in a later picture.)
Here's a shot of the biscuit joining process. Each slice gets four biscuit slots, except the end pieces, which get two each. I like to make unmistakable marks on the wood to remind myself which pieces only get two slots.
Up next: Gluing it all together (again)...