Page 1
Before I go too far, I should mention that not all the pictures that follow are from the same board. I photographed the process a couple of times (on two separate boards), and this series of pictures includes shots from both projects.
This board started out as four pieces of maple, four pieces of walnut, and three pieces of purple heart. The maple and walnut pieces are each 1 1/8" wide x 3/4" thick and 32" long, and the purple heart pieces are 1/4" wide x 3/4" thick and also about 32" long.
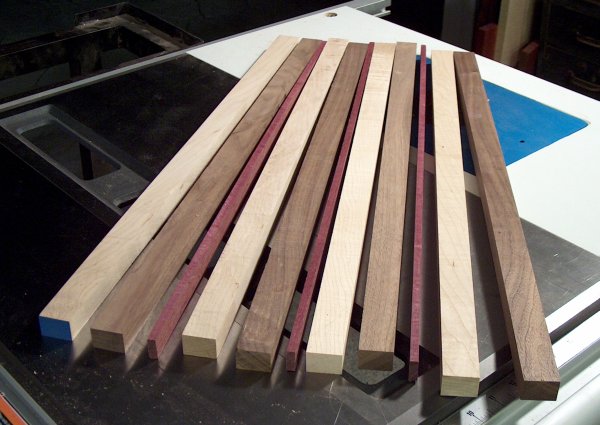
Here are the pieces lined up together, mainly to check that the cut edges are smooth and straight enough to glue without any additional sanding or planing. As you'll see in a bit the order of the pieces is important.

The next step is to glue the pieces together. For this board I used Titebond II. It's good glue for the purpose, although it sets up pretty quickly and doesn't give you much time to adjust the parts once you've put them together.
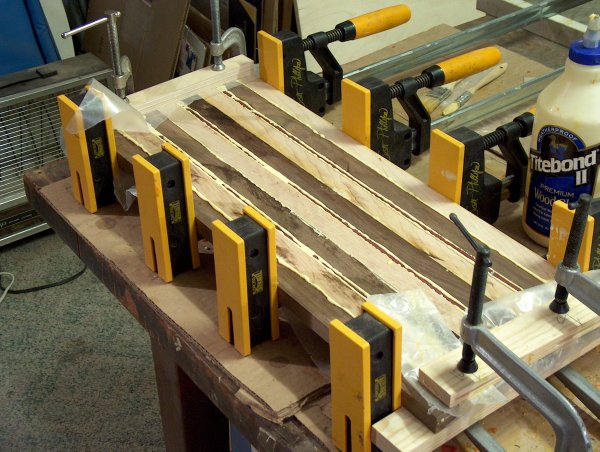
I prefer to put glue on both surfaces, so quite a bit squeezes out when clamping pressure is applied. You'll notice the cauls at either end of the glue-up to keep the pieces aligned horizontally, and the wax paper wrapped around the ends to keep the cauls from becoming a permanent part of the board. After clamping pressure is applied, I wipe up most of the glue.
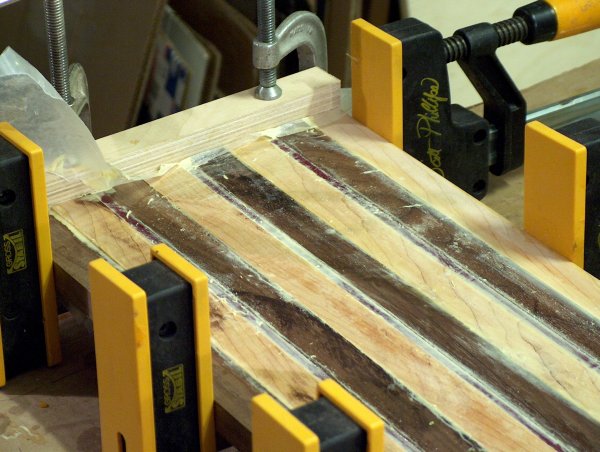
After the glue has cured overnight, I rough-sanded the glued-up board with a belt sander to get it relatively flat. (In the future, I'll use a planer to speed this up.) Blonde that I am, I failed to take any photographs of the glued-up board prior to sanding. It looked much like the picture above, except the glue was dry. I'm sure you can use your imagination.
The next page shows the 3-D effect starting to take shape...