Bud’s Platter
Posted By Vaughn on July 30, 2010
Every once in a while I have the pleasure of working with an extraordinary piece of wood. Bud’s platter is such a case.
Bud is a friend of mine from an Internet travel forum. I’ve known Bud (virtually) for over a decade, and we’ve become good buddies. He’s old enough to be my dad, and probably glad he’s not. As a WWII Navy vet and retired California Highway Patrol officer with a car racing habit, he has a lifetime of stories that are a joy to read.
A while back Bud contacted me and asked if I could help him with his redwood platter. He had a platter that he’d purchased years ago and it needed refinishing. He knows of my lathe work, and figured I have the tools and materials to get the job done. His only stipulation was that he wanted me to keep the platter when I was done. He felt it was a special piece of wood, and he wanted to be sure it would be in the hands of someone who would truly appreciate it. I told him I’d be honored to refinish the platter, and would be proud to add it to my personal collection of turned pieces. Well, somewhere between taking it down off the shelf and getting it boxed to ship, Bud accidentally dropped the platter, and a chunk was broken off the rim. Nonetheless, he taped the piece back in place and shipped it to me, apologizing for the accident.
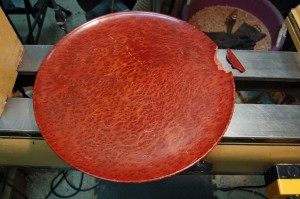
When I opened the package from Bud, I couldn’t believe my eyes. Inside the box was a platter, 15″ in diameter, made out of the most stunning piece of redwood burl I’d ever seen. The gloss finish was indeed in bad shape, and sure enough, there was a chunk broken out of the rim, but it looked fixable. Here’s how it looked fresh out of the box:
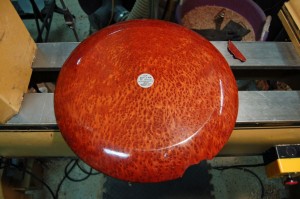
The back side of the platter had a sticker on it advertising the shop that sold or made the platter. The sticker was covering a hole in the bottom of the platter that was used to mount the piece of wood on the original maker’s lathe:
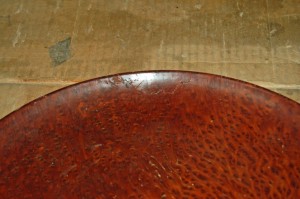
Fortunately, the piece that broke off the rim did so cleanly, and it was a pretty simple fix to glue the broken piece back in place. Hopefully, it would be fairly well hidden once the platter was refinished:
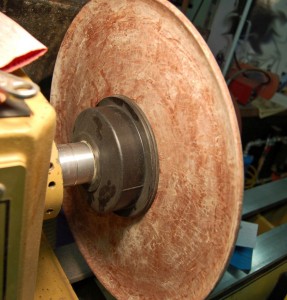
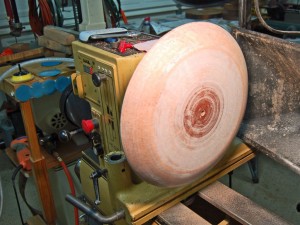
The next task was to strip the old finish off the platter. I don’t have any photos of this process because frankly, the platter looked ruined. I knew in my mind that it would recover, but man, did it look bad. I tried several different strippers and solvents, and nothing seemed to work. In the end, I decided to resort to sanding away all the old finish. To do this, I mounted the platter on my lathe using a vacuum chuck. This is essentially a large suction cup attached to a vacuum pump, and it can hold a smooth piece of wood firmly on the lathe as it spins. This picture shows the platter mounted on the vacuum chuck. You can also see how bad things looked after my failed attempts at stripping the finish off chemically:
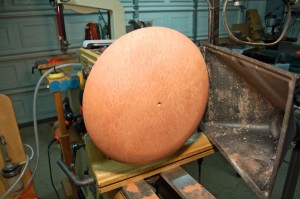
And here’s a look at the back side of the platter shortly into the sanding process. As it turned out, the old finish responded very well to 80 grit sandpaper:
A few minutes of sanding later, it was starting to look pretty good:
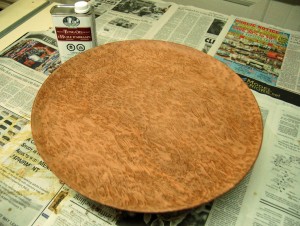
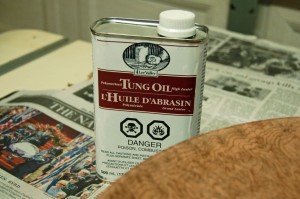
After sanding the entire platter, working my way from 80 grit to 800 grit, it was ready to start applying the finish. For this piece, I decided to try a finish that was new to me, polymerized tung oil. Pure tung oil can take weeks to cure, but it was claimed that the polymerized version cured much more quickly, typically overnight.
Here’s a closer look at the finish I used:
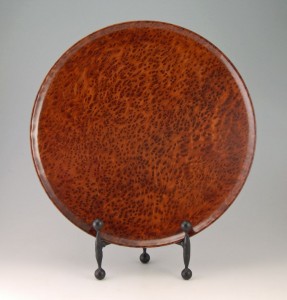
The tung oil did indeed make the wood grain look great (woodworkers call it “popping the grain”), and did in fact harden nicely overnight, but after 6 or 7 coats of the tung oil, I was still unable to get the kind of gloss finish I was looking for. The redwood was still drinking it up. So I went with my old standby of sprayed clear gloss lacquer. I applied many light coats of lacquer (probably nearly a dozen), then wet-sanded the finish with 600 grit sandpaper before buffing it with various buffing compounds. It was a lot of work spread out over several weeks, but in the end, I achieved what I call a “grand piano” finish. Very high gloss, but without the “plastic” feel many of the easier finishing products leave behind. The photos of the finished platter don’t fully show that gloss — glossy surfaces are notoriously difficult to photograph.
Here’s the front of the platter:
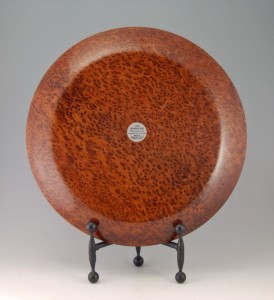
And the back, with the sticker replaced where I found it:
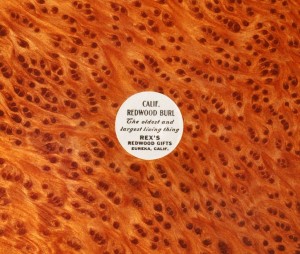
And a closer look at the sticker, showing the origins of this piece. This picture also shows the absolutely gorgeous figure in this piece of wood:
Oh yeah…and the broken chunk on the rim? It’s gone. Vanished. Disappeared. It blended in so nicely that I honestly cannot see the joint where it was glued back into place.
So that’s the story of Bud’s platter. It will hold a very special place in my collection (and my heart) from now on.
Comments
Leave a Reply
You must be logged in to post a comment.