earlier specialty boards
Here are a few of my earlier cutting boards. I'm leaving the pictures here simply for reference.
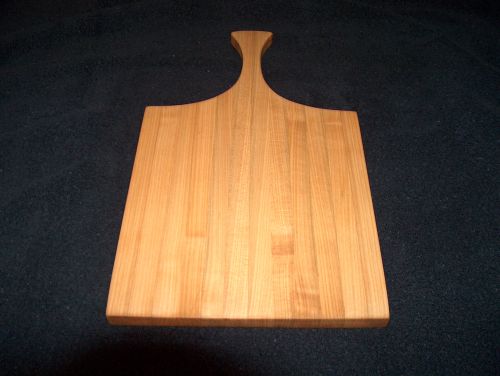
This board is the one that got me started. (Not my very first cutting board, but the first of my most recent run.) I made it as a replacement for an old one that my grandmother used to own. The old one was still seeing almost daily use, and started to show signs of cracking and other age problems, so I decided to replace it. It's simply a dozen pieces of plain edge-grain maple, cut to the same size and shape as my grandma's old board. The board shown in this picture gets used daily at my house.
After making this board, I decided I wanted to make something a bit fancier. I built couple nicer boards, with contrasting shades of maple and some walnut, and gave them away as gifts before I thought to photograph them.
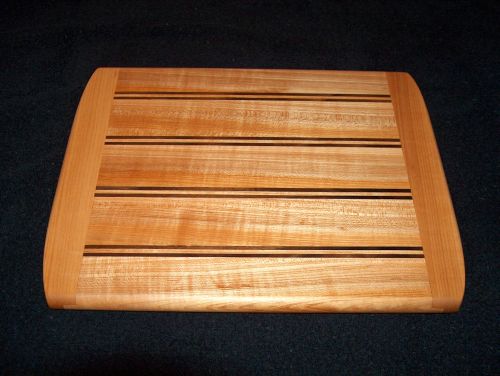
Next, I decided to something a bit different. This board is made of quarter-sawn maple with walnut accents. I wanted to try something a bit more challenging, so this one has tongue and groove end boards (also known as breadboard ends). This technique has been used on cutting boards for centuries to prevent warping.
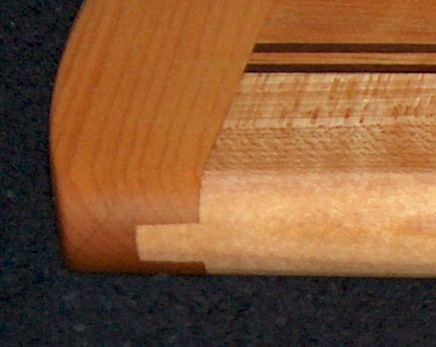
Here's a detail of the tongue and groove joint:
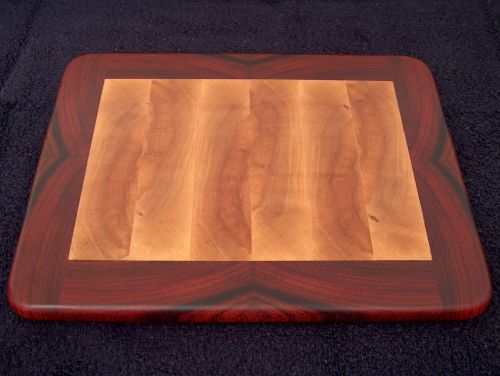
Getting more adventurous, this board is made of American rock maple and African padauk. Unlike the other boards in this group, this board uses the end grain of the wood. End grain is many times harder than face grain wood, but instead of crushing against the wood fibers, a knife blade goes between them much like cutting into a firm brush. This is optimum for both the board and your knives.
Since it was end grain (and very hard wood), this one took much longer to sand to a smooth finish. Also, the frame of padauk had to be cut to very exacting dimensions to fit as tightly as is does.
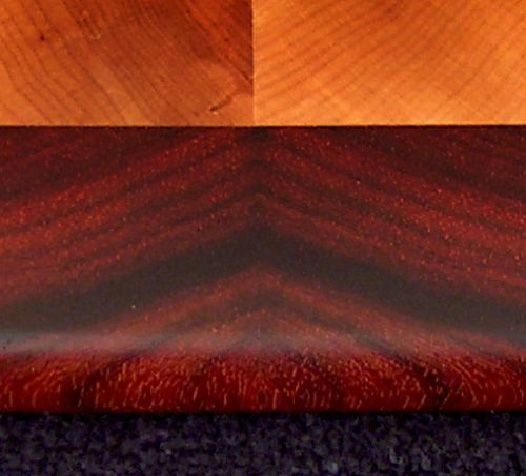
The grain in the padauk really sets this board apart from the rest. Here's a detail of the padauk, and some of the joint tolerances -- you're looking at four individual pieces of wood.
Unfortunately, I didn't fully take into account the different expansion and contraction rates of these two types of wood, and a week or so after this picture was taken, a very slight crack started to appear in one of the maple-to-padauk joints.
I later sawed the "frame" off the maple center, and reattached it with maple splines for better joint stability. (It also looks cool...pics are below.)

You can see the splines on the edge nearest the camera. They are 1" x 1/8" strips of maple, and they run along all four sides — although they're only visible on two sides due to the way I boxed them in.
Here's a thin (1/16" or so) slice from the edge of the board showing the splines that are running along the ends of the maple pieces (the horizontal direction in the picture above). This slice was taken prior to putting in the splines visible above:

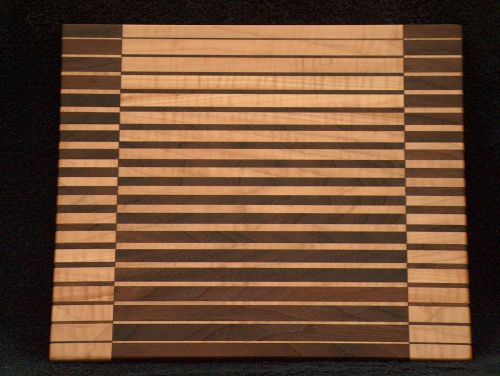
Here's a board I made as an experiment and an exercise in table saw accuracy. I can't take credit for the design of this board — it's shown in a project book supplied with the Incra Jig, a tool used with a table saw (or router table) for making very accurate, repeatable cuts. Each successive strip of dark and light wood is 1/32" thinner than the previous one (or wider, depending on your point of view).

After all the pieces were glued and rough sanded, the ends were cut off and flipped 180 degrees, then re-glued to the board using cherry wood splines. It makes a nice detail, and shows the accuracy of the table saw cuts.
By the time it was sanded smooth, this board ended up about 1/2" thick, which is a bit thin. If I make any more of this style, I intend to use thicker wood.